Introduction
Axes were common weapons and tools throughout Scandinavia
during ‘Viking Age’ (Roesdahl 142); a period that is generally regarded as
ranging from 793 CE to 1066 CE (Harrison 4-6).
The purpose of this blog post is to demonstrate a process for creating a
hand crafted and hand forged replica 10th century Danish steel axe head.
An extant ‘Mammen Style’ axe from this period currently
resides at the National Museum of Denmark in Copenhagen and is dated to 970/971
CE (Figure 1). The original was unearthed in Mammen, Denmark
and the artistic style derives its name from the site of discovery. This style is known for interwoven designs of
beasts and plants (Roesdahl 174). The
original axe depicts interwoven plants and symbols on one side, and a bird,
likely a raven, on the other. Gold and
silver wire inlay were used to create the design.
Materials and Methods
General Warnings and Recommendations
1) Do
not assume that dark steel is cool.
Cold
looking steel can burn you badly.
Treat
metal around an active forge like it is hot.
2) Wear
eye protection at all times when forging and grinding.
Metal or slag in the eye is not your friend.
3) Keep
flammable objects away from forge area.
4) Never
leave cutting chisels (hardy) in the anvil when not in use. This is a significant amputation or injury hazard.
5) Wear
a dust mask of some sort when grinding.
6) Wear
appropriate clothing and closed toe footwear.
Do not wear loose or highly flammable synthetic clothing when forging.
Blade Material
Axes in this time period were usually constructed of iron,
with a piece of steel forge welded onto the end to provide a cutting edge. The steel edge provides a harder cutting
surface that stays sharper for longer.
Carbon distribution in steel greatly affects its physical
characteristics. As one might imagine, it was difficult to manufacture steel in
large quantities with uniform carbon distribution during the Viking Age (Bealer
31). This made steel very expensive and
because of this it was often applied only to the cutting edge or functional surfaces
of many weapons and tools.
As steel is more consistent in carbon distribution, readily
available, and less expensive today (relatively speaking), my axe head in this
process was forged completely from a piece of modern high carbon 1095 steel
(Hrisoulas 20-22). The ‘10’ denotes the
series of the steel, and the ‘95’ indicates that the steel consists of 0.95%
carbon.
Tools and Other Materials
Tongs, anvil, hammers, chisels, files, drift, magnet, propane
forge with blower, baking oven, belt sander, quench bucket, welding gloves,
heavy leather insulated gloves, leather apron, safety goggles, dry chemical
fire extinguisher, breathing mask, closed toe shoes, and long pants
Fluxes (Borax), olive oil, quench water
Period Tools and Materials Not Used
Bellows, coal forge period flux (bees wax, iron filings, and
potash mixtures)
The primary hand tools used in modern times for forging are
virtually unchanged from medieval times.
Various hammers, tongs, anvils, chisels and files are used for shaping,
handling, and cutting iron or steel (Figures
3 and 4). Blacksmiths would often forge their own tools and improvise their
techniques, so some degree of variation should be expected in methodology and
equipment from craftsman to craftsman (Bealer 47).
General Shaping
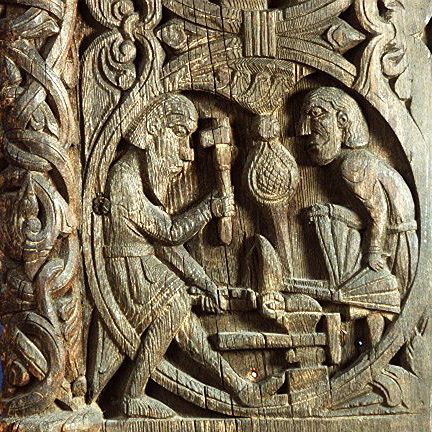
Steel and iron during the Viking Age were generally heated
in coal or charcoal fueled forges which utilized a bellows (Figure 5) for mechanically increasing airflow to the coals,
causing them to burn hotter. Metal was
then placed into the forge and heated. I
utilized a propane fueled forge with an electric blower in my process to
achieve the same results (Figure 8). At
this point in time, I lack the materials and expertise to build and operate a
medieval coal forge. The 1095 steel was
heated to forging temperatures (a bright orange coloration) and flattened and
shaped to provide some basic dimensions for the axe.
Take care not to work the
steel when it is too cool. As the
strength and brightness of the color fades, reheat the steel in the
forge. You can create tiny
fractures and splits by working your steel too cold which can render it
functionally useless. I know this
from experience.
Forge Welding
Forge welding is a process of heating metal to appropriate
temperatures and then striking it with a hammer to combine separate pieces together
into one solid piece. I prepared the
welding surfaces of my steel prior to heating by grinding the steel smooth on a
belt grinder to remove any oxidation and impurities. This helps ensure a clean and complete forge
weld. Forging temperatures vary by the
type of material being worked and I needed to exceed 1750 degrees Fahrenheit
(Hrisoulas 22) for the 1095 steel I used.
As a practical matter, a blacksmith can use color to
determine an appropriate heating temperature for the material used. For successful forge welding, you are looking
for a bright yellow, almost white coloration (Hrisoulas 30).
During the heating process I applied flux, which acts as a
lubricant and cleanser, to the welding surfaces. Flux prevents further oxidation of the iron
or steel that can hinder setting a weld.
A number of materials were used as flux in the 10th century
including bees wax, iron filings, and potash mixtures. In my process I used Borax (sodium borate)
which is a commonly used and readily available modern flux.
Refined Shaping
With a successful forge weld, I then proceeded to shape the
blade surface and eye over the course of several heats using hammer and
anvil.
- In hindsight it would have
been a better idea to shape the eye (opening for handle) a bit before
folding and welding as it would have been easier to manipulate at that
stage.
The eye of the axe can be punched through or formed from
folding a piece of iron or steel over itself and forge welding the pieces
together, thereby creating a closed loop for the eye. The extant Mammen Axe appears to have used
the punch method for creating the eye while I used the folding and forge
welding method. Both processes were in use
during the Viking Age. I used a drift (a
tapered, punch like piece of iron) to shape the internal dimensions of the eye
by hammering it down into the heated eye. The taper of the drift helps maintain
a tight fit for a handle, keeping the axe head from flying off when in
use.
Once I achieved the general shape and dimensions I desired,
I further refined the shape and smoothness of the axe with a modern belt
grinder (Figures 6 and 7). In period,
this type of work would have been done with various files and stones (Fitzhugh
48).
- Unfortunately, during my
forging process, some of my hammer strikes penetrated deeper into the
steel than I would have preferred, leaving some hammer imperfections in
the face of one side of the axe that could not be removed without thinning
the steel too much.
Quenching and Hardening
Next in this process, the axe head was heated to a hardening
temperature and then rapidly cooled by quenching in an olive oil bath (Figure
9).
To ensure that steel has been heated to an appropriate temperature
before quenching a magnet can be used. Steel
loses its magnetic properties when it
has reached hardening temperatures and is ready for quenching (Hrisoulas 56).
This heating and quenching of the axe realigns the internal structure of the
metal, making it both very hard, yet also brittle.
Tempering
Since a brittle axe is not a very useful axe, it must next
tempered. This process adds some
flexibility back into the steel, while maintaining adequate hardness for
putting an edge to the blade. After removing
the residue from quenching with sandpaper, I tempered the steel by carefully
heating it until it reached a yellow-brownish color, not glowing, (Figure 11)
indicative of a temperature between 425 - 475 degrees Fahrenheit (Hrisoulas
57). I heated the axe in my kitchen oven
for about an hour rather than using the forge to help ensure an even application
of heat.
Polish and Sharpen
Following the heat treatments, a belt grinder was used to
further refine the shape and face of the axe head, taking care not to overheat
the steel in the process. This would negatively impact the heat treatment
already applied. At this point I
carefully added a fairly dull cutting edge as well.
Closing Discussion
- It was certainly a
learning process and overall, I am well pleased with the results. The axe dimensions and shape did not
come out completely as I would have liked; for example, the extant axe is
6.5 inches long while mine is almost 7.5 inches long (Heath 55).
- Additionally, I went back
later and further tempered the eye region of the axe to ensure that it has
the needed flex on an area of high strain.
Bibliography
Bealer, Alex W. The
Art of Blacksmithing. Edison: Castle
Books, 1995.
Cowgill, J., M. de Neergard, and
N. Griffiths.
Medieval Finds from Excavations in London:1
Knives and Scabbards. Woodbridge: The Boydell Press, 2000.
Fitzhugh, William W. and Elisabeth I. Ward, eds. Vikings:
The North Atlantic Saga. Washington: Smithsonian Institution Press, 2000.
Harrison, Mark. Viking
Hersir 793-1066AD. Oxford:
Osprey Publishing Ltd., 1998.
Heath, Ian.
The
Vikings. London:
Reed International Books Ltd., 1997.
Hrisoulas, Jim. The
Complete Bladesmith: Forging Your Way to
Perfection. Boulder:
Paladin Press, 1987.
Rosedahl, Else. The Vikings. Trans. Susan M. Margeson and Kristen
Williams. London: Penguin Group, 1998.
Shadrake, Dan and Susanna Shadrake. Barbarian Warriors: Saxons, Vikings, Normans. London: Brassey’s Ltd., 1997.
Theophilus. On Divers Arts: The Foremost Medieval Treatsie on Painting,
Glassmaking, and Metalwork. Trans.
John G. Hawthorne and Cyril Stanley Smith.
New York:
Dover Publications Inc., 1979.
Appendix
Figure 1: Extant
Mammen Axe (970/971 CE)
Figure 2: Völund’s forge. 8th/9th Century Ardre
Image Stone from Gotalnd Sweden
now resides at Swedish Museum of Natural Antiquities in Stockholm.
Figure 3: Mästermyr Chest and Blackmith/Carpenter Tools dated to the
Viking Age
Figure 4: Viking
Age forge tools
Figure 5: 12th
Century Carving from Hylestad Stave Church in Setesdal, Norway
Figure 6: Initial
grinding
Figure 7: Axe
head after first grind
Figure 8: The
Forge
Figure 9: Oil
Quench
Figure 10: Post
quenching
Figure 11: Post
tempering


No comments:
Post a Comment